Introduction
A Guide to Planting and Cultivating Chives is a comprehensive resource that provides step-by-step instructions on how to successfully grow and care for chives. This guide covers everything from selecting the right location and soil to planting and maintaining chive plants. Whether you are a beginner or an experienced gardener, this guide will equip you with the knowledge and techniques needed to cultivate healthy and thriving chive plants in your garden.
The Benefits of Growing Chives in Your Garden
Chives are a versatile and easy-to-grow herb that can add a burst of flavor to your culinary creations. Not only do they taste great, but they also offer a range of health benefits. If you’re considering adding chives to your garden, here are some of the benefits you can expect.
First and foremost, chives are packed with nutrients. They are an excellent source of vitamins A, C, and K, as well as minerals like calcium and iron. Incorporating chives into your diet can help boost your immune system, support bone health, and improve digestion. Plus, they are low in calories and fat, making them a healthy addition to any meal.
Another benefit of growing chives is their ability to deter pests. Chives contain natural compounds that repel insects, making them a great companion plant for your garden. Planting chives near susceptible crops can help keep pests like aphids, carrot flies, and Japanese beetles at bay. This natural pest control method can reduce the need for harmful chemical pesticides, making your garden a safer and more eco-friendly space.
In addition to their nutritional and pest-repelling properties, chives also have medicinal benefits. They have been used for centuries in traditional medicine to treat various ailments. Chives have antimicrobial properties that can help fight off infections and boost your overall health. They are also known for their anti-inflammatory effects, which can help alleviate symptoms of arthritis and other inflammatory conditions.
Growing chives in your garden can also be a great way to attract beneficial pollinators. The beautiful purple flowers that chives produce are not only visually appealing but also a magnet for bees, butterflies, and other pollinators. By providing a food source for these important creatures, you are helping to support biodiversity and promote a healthy ecosystem in your garden.
Furthermore, chives are incredibly easy to grow, even for beginners. They can be grown from seeds or transplants and thrive in a variety of soil types. Chives prefer well-draining soil and full sun but can tolerate partial shade. They are also relatively drought-tolerant, making them a low-maintenance addition to your garden.
To plant chives, simply sow the seeds or transplant the seedlings into your garden bed or container. Space them about 6 inches apart to allow for proper growth. Water them regularly, especially during dry spells, and fertilize them with a balanced organic fertilizer every few weeks. Chives can be harvested once they reach a height of 6-8 inches. Simply snip off the leaves at the base, leaving about an inch of growth to allow for regrowth.
In conclusion, growing chives in your garden offers a range of benefits. From their nutritional value to their pest-repelling properties and medicinal benefits, chives are a valuable addition to any garden. Their ability to attract pollinators and their ease of cultivation make them a great choice for both experienced and novice gardeners. So why not give chives a try and enjoy the many benefits they have to offer?
Step-by-Step Guide to Planting Chives in Containers
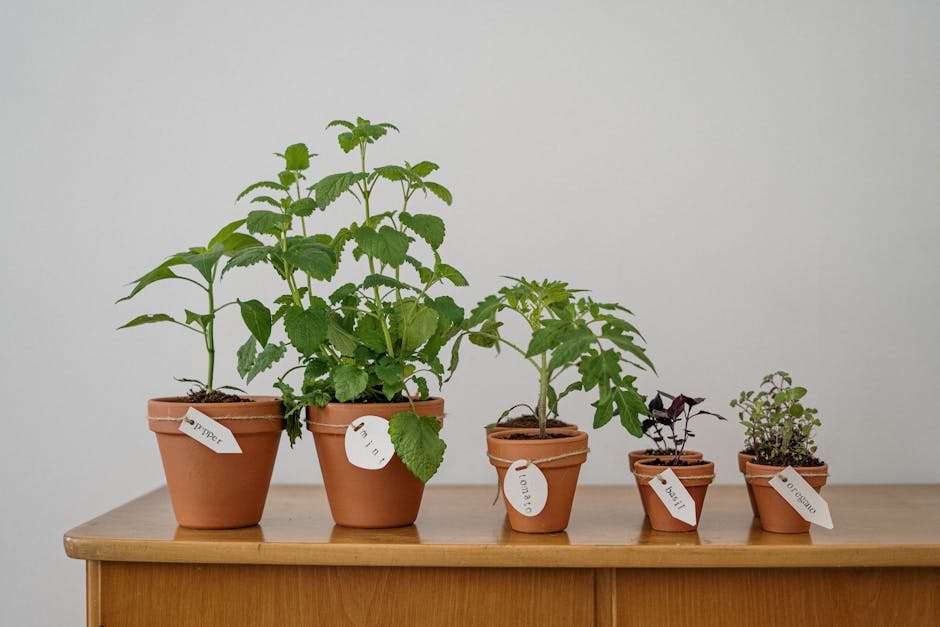
Chives are a versatile and flavorful herb that can be easily grown in containers. Whether you have a small balcony or a large backyard, planting chives in containers is a great way to enjoy fresh herbs all year round. In this step-by-step guide, we will walk you through the process of planting and cultivating chives in containers.
First, choose a container that is at least 6 inches deep and has drainage holes at the bottom. Chives prefer well-draining soil, so make sure to use a potting mix that is specifically formulated for container gardening. Fill the container with the potting mix, leaving about an inch of space at the top.
Next, it’s time to plant the chive seeds or seedlings. If you are starting from seeds, sprinkle them evenly over the soil surface and lightly press them into the soil. If you are using seedlings, gently remove them from their nursery pots and place them in the container, spacing them about 6 inches apart. Make sure to cover the roots with soil and gently firm it around the base of the plants.
After planting, water the chives thoroughly to settle the soil and provide moisture for the seeds or seedlings. Chives prefer consistent moisture, so make sure to water them regularly, especially during dry spells. However, be careful not to overwater, as chives don’t like soggy soil.
Chives thrive in full sun, so place the container in a sunny spot where it will receive at least 6 hours of direct sunlight each day. If you don’t have a sunny spot, chives can tolerate partial shade, but they may not grow as vigorously.
As the chives grow, you can start harvesting the leaves when they reach about 6 inches in height. To harvest, simply snip off the leaves at the base using a pair of sharp scissors or garden shears. Regular harvesting will encourage the plants to produce more leaves and promote bushier growth.
To keep your chives healthy and productive, it’s important to fertilize them regularly. Use a balanced, water-soluble fertilizer every 4-6 weeks during the growing season. Follow the instructions on the fertilizer package for the correct dosage and application method.
Chives are relatively pest and disease-free, but they can occasionally be bothered by aphids or onion thrips. If you notice any signs of infestation, such as distorted leaves or sticky residue, you can try spraying the plants with a mixture of water and mild dish soap. Alternatively, you can introduce beneficial insects like ladybugs or lacewings to control the pests naturally.
In colder climates, chives may die back in winter, but they will usually regrow in spring. If you live in an area with harsh winters, you can protect the plants by moving the container indoors or covering it with a layer of mulch.
In conclusion, planting and cultivating chives in containers is a rewarding and straightforward process. By following these step-by-step instructions, you can enjoy a bountiful harvest of fresh chives throughout the year. So why not give it a try and add this versatile herb to your container garden? Happy gardening!
Essential Tips for Cultivating Healthy and Flavorful Chives
Chives are a versatile and flavorful herb that can add a burst of freshness to any dish. Whether you’re a seasoned gardener or a beginner, cultivating chives is a rewarding and relatively easy task. In this guide, we’ll provide you with essential tips for planting and cultivating healthy and flavorful chives.
First and foremost, it’s important to choose the right location for your chives. They thrive in full sun but can tolerate partial shade. Make sure the soil is well-draining and rich in organic matter. If your soil is heavy or clay-like, consider adding compost or well-rotted manure to improve its texture and fertility.
When it comes to planting chives, you have two options: starting from seeds or transplanting young plants. If you choose to start from seeds, sow them directly into the ground in early spring, once the soil has warmed up. Plant the seeds about half an inch deep and space them 6 to 8 inches apart. Keep the soil consistently moist until the seeds germinate, which usually takes about two weeks.
If you prefer to transplant young chive plants, you can purchase them from a nursery or propagate them from existing plants. To propagate chives, simply divide the clumps in early spring or fall. Dig up the clump and gently separate the individual plants, making sure each division has a good amount of roots. Replant the divisions in their new location, spacing them 6 to 8 inches apart.
Once your chives are planted, it’s important to provide them with proper care to ensure their health and flavor. Water your chives regularly, especially during dry spells, but be careful not to overwater them as they don’t like soggy soil. Mulching around the plants can help retain moisture and suppress weeds.
Fertilizing chives is generally not necessary if your soil is already rich in organic matter. However, if you notice slow growth or pale leaves, you can apply a balanced organic fertilizer in early spring. Avoid using high-nitrogen fertilizers, as they can promote excessive leaf growth at the expense of flavor.
To keep your chives looking tidy and encourage new growth, it’s a good idea to trim them regularly. Snip off the leaves from the outside of the clump, leaving about an inch of growth above the soil. This will promote the development of fresh leaves and prevent the plant from becoming too leggy.
Chives are relatively pest and disease-resistant, but they can occasionally be bothered by aphids or onion thrips. If you notice any signs of infestation, you can spray the plants with a mild insecticidal soap or use organic pest control methods.
In conclusion, cultivating healthy and flavorful chives is a rewarding endeavor that can enhance your culinary creations. By choosing the right location, providing proper care, and regular maintenance, you can enjoy a bountiful harvest of this versatile herb. So why not give it a try and add a touch of freshness to your garden and your meals?
Creative Ways to Use Fresh Chives in Your Cooking
Chives are a versatile herb that can add a burst of flavor to any dish. Whether you’re a seasoned chef or a beginner in the kitchen, incorporating fresh chives into your cooking can take your culinary creations to the next level. In this section, we will explore some creative ways to use fresh chives in your cooking, allowing you to make the most of this delightful herb.
One of the simplest and most popular ways to use fresh chives is as a garnish. Sprinkling finely chopped chives on top of soups, salads, or roasted vegetables adds a pop of color and a subtle onion-like flavor. The vibrant green hue of chives can instantly elevate the visual appeal of any dish, making it look more appetizing and inviting.
If you’re looking to add a zesty kick to your dips and spreads, fresh chives are the perfect ingredient. Mix chopped chives into cream cheese or sour cream to create a delicious and tangy chive dip. This versatile dip can be served with crackers, chips, or fresh vegetables, making it a crowd-pleasing appetizer for any gathering.
For those who enjoy experimenting with flavors, chive-infused oils and vinegars are a must-try. Simply chop a handful of fresh chives and place them in a bottle with your choice of oil or vinegar. Let the mixture sit for a few days to allow the flavors to meld together. The resulting infused oil or vinegar can be used to dress salads, marinate meats, or drizzle over roasted vegetables for an extra burst of chive goodness.
Fresh chives can also be incorporated into homemade breads and savory pastries. Add a handful of chopped chives to your bread dough or pastry mix to infuse it with a delightful onion-like flavor. The aroma of freshly baked chive bread or chive-infused pastries will fill your kitchen and entice your taste buds.
If you’re a fan of eggs, fresh chives can take your breakfast to new heights. Sprinkle chopped chives over scrambled eggs or omelets for a burst of freshness and a hint of onion flavor. The combination of fluffy eggs and the mild bite of chives is a match made in culinary heaven.
For those who enjoy experimenting with cocktails, fresh chives can be a surprising addition to your drink repertoire. Muddle a few chives in a cocktail shaker with your favorite spirits, such as vodka or gin, to infuse your drink with a unique herbal twist. The result is a refreshing and aromatic cocktail that will impress your guests and leave them wanting more.
In conclusion, fresh chives are a versatile herb that can be used in a variety of creative ways in your cooking. From simple garnishes to infused oils and vinegars, chives can add a burst of flavor and visual appeal to any dish. So, next time you’re in the kitchen, don’t forget to reach for a bunch of fresh chives and let your culinary creativity soar.
Troubleshooting Common Issues When Growing Chives
Chives are a versatile and flavorful herb that can be easily grown in your garden or even in pots on your windowsill. However, like any plant, they can sometimes encounter issues that may hinder their growth. In this guide, we will explore some common problems that you may encounter when growing chives and provide you with troubleshooting tips to help you overcome them.
One common issue that chives may face is overwatering. While it is important to keep the soil moist, excessive watering can lead to root rot and other fungal diseases. To prevent this, make sure that the soil is well-draining and avoid watering the plants too frequently. Allow the top inch of soil to dry out before watering again.
On the other hand, underwatering can also be a problem for chives. If the soil becomes too dry, the plants may wilt and their growth may be stunted. To avoid this, check the moisture level of the soil regularly and water the plants when the top inch of soil feels dry to the touch. Be sure to water deeply, allowing the water to penetrate the root zone.
Another issue that chives may encounter is poor soil quality. Chives prefer a fertile and well-draining soil with a pH level between 6.0 and 7.0. If your soil is too compacted or lacks nutrients, it can affect the growth and health of your chives. To improve the soil, you can add organic matter such as compost or well-rotted manure. This will help to enrich the soil and provide the necessary nutrients for your chives to thrive.
Pests can also be a problem when growing chives. Aphids, thrips, and onion maggots are some common pests that may attack your plants. To control these pests, you can use insecticidal soap or neem oil. These organic solutions are safe for both the plants and the environment. Regularly inspect your plants for any signs of pest infestation and take action immediately to prevent further damage.
Diseases can also affect the health of your chives. Leaf blight, downy mildew, and rust are some common diseases that chives may be susceptible to. To prevent the spread of diseases, make sure to provide adequate spacing between the plants to promote air circulation. Avoid overhead watering, as this can create a moist environment that is favorable for disease development. If you notice any signs of disease, remove the affected leaves or plants to prevent the spread.
Lastly, chives may sometimes fail to produce flowers. This can be due to various factors such as inadequate sunlight, improper fertilization, or overcrowding. To encourage flowering, make sure that your chives receive at least six hours of direct sunlight each day. Fertilize the plants with a balanced fertilizer once a month during the growing season. If your chives are overcrowded, divide them every few years to promote better growth and flowering.
By being aware of these common issues and following the troubleshooting tips provided, you can ensure that your chives grow healthy and vibrant. Remember to monitor your plants regularly, provide them with the right conditions, and take prompt action when necessary. With a little care and attention, you can enjoy a bountiful harvest of fresh chives to enhance the flavor of your culinary creations.


