Introduction
Introduction:
“A Guide to Successfully Cultivating Okra in Your Home Vegetable Garden” provides essential information and practical tips for individuals interested in growing okra plants in their own backyard. This guide aims to equip gardeners with the necessary knowledge and techniques to cultivate healthy and productive okra plants, from selecting the right variety to caring for the plants throughout their growth stages. Whether you are a beginner or an experienced gardener, this guide will help you navigate the process of growing okra and ensure a successful harvest of this versatile and nutritious vegetable.
The Benefits of Growing Okra in Your Home Vegetable Garden
Okra, also known as lady’s fingers, is a versatile and nutritious vegetable that can be easily grown in your home vegetable garden. Not only does it add a unique flavor and texture to your meals, but it also offers a range of health benefits. In this guide, we will explore the benefits of growing okra in your garden and provide you with some tips for successful cultivation.
One of the main advantages of growing okra is its nutritional value. This vegetable is low in calories and fat, making it an excellent choice for those looking to maintain a healthy diet. Okra is also a good source of dietary fiber, which aids in digestion and helps to regulate blood sugar levels. Additionally, it contains essential vitamins and minerals such as vitamin C, vitamin K, and folate, which are important for overall health and wellbeing.
Another benefit of growing okra is its versatility in the kitchen. This vegetable can be used in a variety of dishes, from soups and stews to stir-fries and salads. Its unique texture adds a pleasant crunch to any meal, and its mild flavor pairs well with a wide range of ingredients. Whether you prefer it fried, grilled, or pickled, okra offers endless possibilities for culinary experimentation.
In addition to its nutritional value and culinary versatility, growing okra in your home vegetable garden can also be a rewarding and enjoyable experience. Okra plants are relatively easy to grow, making them suitable for both novice and experienced gardeners. They thrive in warm climates and require full sun exposure, making them an ideal choice for gardens in tropical and subtropical regions.
To successfully cultivate okra, start by selecting a sunny spot in your garden with well-draining soil. Okra plants prefer soil that is rich in organic matter, so consider adding compost or well-rotted manure to improve the soil’s fertility. Sow the seeds directly into the soil, spacing them about 12 to 18 inches apart. Keep the soil consistently moist but not waterlogged, as excessive moisture can lead to root rot.
As the plants grow, provide them with support by staking or trellising them. This will help to prevent the plants from toppling over and will make harvesting easier. Okra plants typically reach a height of 3 to 6 feet, so ensure that your support structure is tall enough to accommodate their growth.
Regularly monitor your okra plants for pests and diseases, such as aphids, spider mites, and powdery mildew. If necessary, treat the affected plants with organic insecticides or fungicides to prevent further damage. Additionally, be sure to harvest the okra pods when they are young and tender, as older pods can become tough and fibrous.
In conclusion, growing okra in your home vegetable garden offers a range of benefits. Not only is it a nutritious and versatile vegetable, but it also provides a rewarding gardening experience. By following the tips outlined in this guide, you can successfully cultivate okra and enjoy its many culinary delights. So why not give it a try and add this unique vegetable to your garden this season?
Step-by-Step Guide to Planting Okra Seeds in Your Garden
Okra, also known as lady’s fingers, is a versatile and nutritious vegetable that can be easily grown in your home vegetable garden. Whether you are a seasoned gardener or a beginner, cultivating okra can be a rewarding experience. In this step-by-step guide, we will walk you through the process of planting okra seeds in your garden, ensuring a successful harvest.
Firstly, it is important to choose the right time to plant your okra seeds. Okra thrives in warm weather, so it is best to wait until the soil temperature reaches around 65°F (18°C) before planting. This usually occurs in late spring or early summer, depending on your location. Once the soil is warm enough, you can proceed to the next step.
Prepare the soil by loosening it with a garden fork or tiller. Okra prefers well-drained soil, so make sure to remove any rocks or debris that may hinder proper drainage. Additionally, enrich the soil with organic matter, such as compost or well-rotted manure, to provide the necessary nutrients for your okra plants.
Next, it’s time to sow the okra seeds. Create furrows in the soil, about 1 inch (2.5 cm) deep and 12-18 inches (30-45 cm) apart. Place the seeds in the furrows, spacing them about 3-4 inches (7-10 cm) apart. Cover the seeds with soil and gently pat it down to ensure good seed-to-soil contact.
Water the newly planted seeds thoroughly, making sure the soil is evenly moist. Avoid overwatering, as this can lead to rotting of the seeds. As the seeds germinate and the plants start to grow, it is important to maintain consistent moisture levels in the soil. Water deeply once or twice a week, depending on the weather conditions, to keep the soil moist but not waterlogged.
As your okra plants grow, they will benefit from regular feeding. Apply a balanced fertilizer, following the manufacturer’s instructions, every 4-6 weeks. This will provide the necessary nutrients for healthy growth and abundant fruit production. Additionally, consider mulching around the plants to conserve moisture, suppress weeds, and regulate soil temperature.
Okra plants can grow quite tall, reaching heights of 4-6 feet (1.2-1.8 meters). To support their growth and prevent them from toppling over, it is advisable to stake or cage the plants. This will also make harvesting easier, as the pods will be more accessible.
Keep an eye out for pests and diseases that may affect your okra plants. Common pests include aphids, caterpillars, and spider mites. Regularly inspect the plants and take appropriate measures, such as handpicking or using organic insecticides, to control infestations. Additionally, be on the lookout for signs of diseases, such as powdery mildew or root rot, and take prompt action to prevent their spread.
Harvesting okra is an exciting part of the process. The pods are ready to be picked when they are about 2-4 inches (5-10 cm) long and still tender. Use a sharp knife or scissors to cut the pods from the plant, being careful not to damage the stem or leaves. Harvesting regularly will encourage the plants to produce more pods.
In conclusion, growing okra in your home vegetable garden can be a rewarding experience. By following this step-by-step guide, you can successfully plant okra seeds and enjoy a bountiful harvest. Remember to choose the right time to plant, prepare the soil properly, provide adequate water and nutrients, support the plants as they grow, and protect them from pests and diseases. With a little care and attention, you can cultivate delicious okra in your own backyard.
Essential Tips for Maintaining Healthy Okra Plants
Okra, also known as lady’s fingers, is a versatile and nutritious vegetable that can be easily grown in your home vegetable garden. With its vibrant green pods and unique taste, okra is a favorite among many gardeners. However, like any other plant, okra requires proper care and attention to thrive. In this section, we will provide you with essential tips for maintaining healthy okra plants.
First and foremost, it is important to choose the right location for your okra plants. Okra thrives in full sun, so make sure to select a spot in your garden that receives at least six to eight hours of direct sunlight each day. Additionally, okra prefers well-drained soil with a pH level between 6.0 and 6.8. Before planting, it is advisable to amend the soil with organic matter such as compost or aged manure to improve its fertility and drainage.
When it comes to planting okra, timing is crucial. Okra is a warm-season crop that thrives in temperatures between 75°F and 90°F. Therefore, it is best to wait until all danger of frost has passed and the soil has warmed up before planting your okra seeds or seedlings. In most regions, this is typically around late spring or early summer.
Okra plants require adequate spacing to grow and develop properly. When planting okra seeds, space them about 12 to 18 inches apart in rows that are 3 to 4 feet apart. If you are using seedlings, transplant them at the same spacing. Providing enough space between plants allows for good air circulation, which helps prevent diseases and promotes healthy growth.
Watering is an essential aspect of okra plant care. Okra plants require regular watering, especially during dry spells. It is important to keep the soil consistently moist but not waterlogged. Water deeply, ensuring that the water reaches the roots. Mulching around the plants can help retain moisture and suppress weed growth. However, be careful not to pile mulch against the stems, as this can lead to rot.
Fertilizing okra plants is also crucial for their overall health and productivity. Before planting, incorporate a balanced fertilizer into the soil according to the package instructions. Once the plants are established, side-dress them with a nitrogen-rich fertilizer every four to six weeks. This will provide them with the necessary nutrients for vigorous growth and abundant pod production.
Regularly inspecting your okra plants for pests and diseases is essential for maintaining their health. Common pests that can affect okra include aphids, flea beetles, and stink bugs. If you notice any signs of pest infestation, such as holes in the leaves or sticky residue, take appropriate measures to control them. Organic insecticides or homemade remedies like neem oil can be effective in managing pests.
In terms of diseases, okra is susceptible to fungal infections such as powdery mildew and root rot. To prevent these diseases, avoid overhead watering and ensure good air circulation around the plants. If necessary, apply fungicides according to the instructions on the label.
In conclusion, successfully cultivating okra in your home vegetable garden requires proper care and attention. By choosing the right location, providing adequate spacing, watering regularly, fertilizing appropriately, and monitoring for pests and diseases, you can ensure the health and productivity of your okra plants. With these essential tips in mind, you’ll be well on your way to enjoying a bountiful harvest of delicious okra from your own garden.
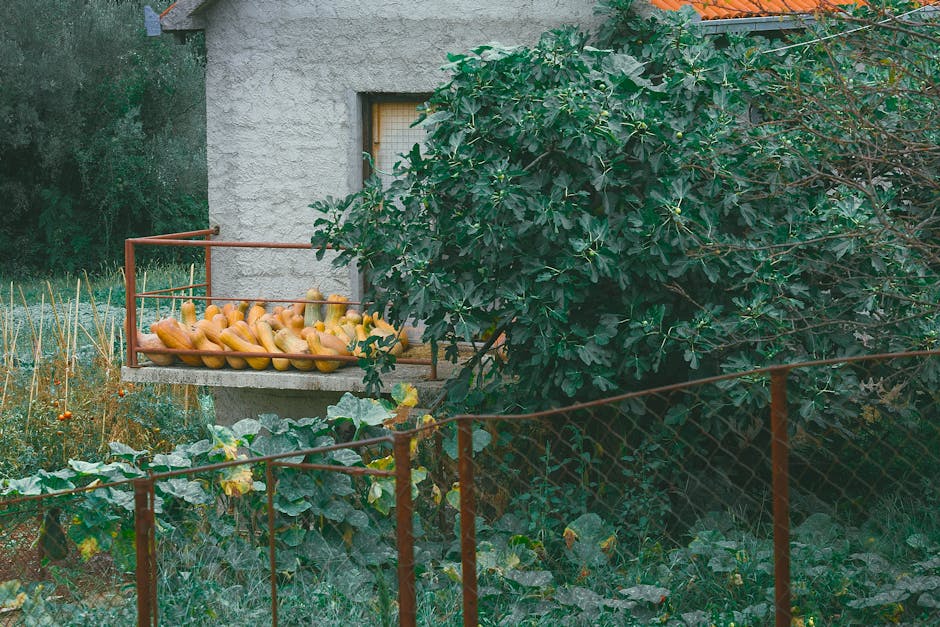
Harvesting and Storing Okra: A Comprehensive Guide
Harvesting and Storing Okra: A Comprehensive Guide
Now that you have successfully grown okra in your home vegetable garden, it’s time to learn how to harvest and store this delicious and versatile vegetable. Harvesting okra at the right time and storing it properly will ensure that you can enjoy its fresh taste for weeks to come. In this comprehensive guide, we will walk you through the steps to harvest and store okra, so you can make the most of your bountiful harvest.
When it comes to harvesting okra, timing is crucial. Okra pods should be harvested when they are young and tender, typically around 3 to 4 inches in length. Waiting too long to harvest can result in tough and fibrous pods that are less enjoyable to eat. To determine if your okra is ready for harvest, gently press your thumb against the pod. If it feels firm and snaps easily, it is ready to be picked.
To harvest okra, use a sharp pair of garden shears or a knife to cut the stem just above the cap. Be careful not to damage the plant or nearby pods while harvesting. It’s best to harvest okra in the morning when the pods are still cool and crisp. Avoid harvesting in the heat of the day, as the pods can become limp and lose their freshness.
Once you have harvested your okra, it’s time to store it properly to maintain its quality. Okra is best stored in a cool and dry place, such as the refrigerator. Before storing, make sure to remove any dirt or debris from the pods. You can do this by gently wiping them with a damp cloth or rinsing them under cold water. Avoid soaking the pods, as excess moisture can cause them to spoil quickly.
To extend the shelf life of your okra, consider blanching it before storing. Blanching involves briefly immersing the pods in boiling water, followed by an ice bath to stop the cooking process. Blanching helps preserve the color, texture, and flavor of the okra. After blanching, pat the pods dry and place them in airtight containers or freezer bags. Label the containers with the date of blanching to keep track of their freshness.
If you prefer to freeze your okra for long-term storage, it’s important to take a few extra steps. Start by washing and trimming the pods, removing the stem and cap. Then, blanch the okra in boiling water for 3 minutes before transferring it to an ice bath. Once cooled, drain the okra and place it in freezer-safe containers or bags. Make sure to remove as much air as possible from the containers to prevent freezer burn. Frozen okra can be stored for up to 12 months.
When it’s time to use your stored okra, thaw it in the refrigerator overnight before cooking. Avoid thawing at room temperature, as this can promote bacterial growth. Frozen okra works well in soups, stews, and stir-fries, but it may lose some of its crispness after freezing.
By following these simple steps for harvesting and storing okra, you can enjoy the fruits of your labor long after the growing season has ended. Remember to harvest at the right time, store in a cool and dry place, and consider blanching or freezing for extended shelf life. With these tips in mind, you’ll be able to savor the taste of fresh okra all year round.
Troubleshooting Common Issues in Okra Cultivation
Okra, also known as lady’s fingers, is a versatile and nutritious vegetable that can be easily grown in your home vegetable garden. However, like any other plant, okra cultivation can sometimes come with its fair share of challenges. In this section, we will discuss some common issues that you may encounter while growing okra and provide you with troubleshooting tips to help you overcome them.
One common problem that many gardeners face when growing okra is poor germination. Okra seeds have a hard outer coating, which can make it difficult for them to absorb water and germinate. To improve germination rates, it is recommended to soak the seeds in water overnight before planting them. This will help soften the seed coat and promote faster germination. Additionally, make sure to plant the seeds in well-draining soil and keep the soil consistently moist until the seeds sprout.
Another issue that gardeners often encounter is stunted growth in okra plants. This can be caused by a variety of factors, including nutrient deficiencies, improper watering, or overcrowding. To ensure healthy growth, it is important to provide your okra plants with adequate nutrients. Incorporating organic matter, such as compost or well-rotted manure, into the soil before planting can help improve soil fertility. Additionally, regular applications of a balanced fertilizer can provide the necessary nutrients for optimal growth.
Proper watering is also crucial for the successful cultivation of okra. While okra plants require regular watering, it is important to avoid overwatering, as this can lead to root rot and other diseases. The best way to determine when to water your okra plants is to check the moisture level of the soil. Stick your finger about an inch into the soil, and if it feels dry, it’s time to water. Additionally, it is recommended to water the plants at the base, rather than overhead, to prevent the leaves from getting wet, which can increase the risk of fungal diseases.
Pests can also pose a significant threat to your okra plants. One common pest that affects okra is the aphid. These small, soft-bodied insects feed on the sap of the plants, causing stunted growth and yellowing of the leaves. To control aphids, you can spray your plants with a mixture of water and dish soap or use insecticidal soap. Another common pest is the okra borer, which burrows into the stems of the plants, causing wilting and plant death. To prevent infestations, it is recommended to regularly inspect your plants for any signs of pests and take appropriate measures, such as removing and destroying infested plants.
In conclusion, while okra cultivation may come with its fair share of challenges, with proper care and attention, you can successfully grow this nutritious vegetable in your home vegetable garden. By addressing common issues such as poor germination, stunted growth, improper watering, and pest infestations, you can ensure the health and productivity of your okra plants. So go ahead, give okra a try, and enjoy the satisfaction of harvesting your own fresh and delicious lady’s fingers.


