Introduction
Introduction:
When it comes to seed starting, having the right supplies is essential for ensuring successful germination and healthy plant growth. From containers and growing mediums to lighting and watering tools, having a well-equipped setup can greatly increase your chances of achieving optimal results. In this article, we will explore the essential supplies needed for seed starting, providing you with a comprehensive guide to get your seeds off to a great start.
The Importance of Quality Seed Starting Trays and Pots
Starting seeds is an exciting and rewarding way to kickstart your garden. Whether you’re a seasoned gardener or a beginner, having the right supplies is essential for successful seed starting. One of the most important supplies you’ll need is quality seed starting trays and pots. These containers play a crucial role in providing the ideal environment for your seeds to germinate and grow into healthy seedlings.
When it comes to seed starting trays, there are a few key factors to consider. First and foremost, you want trays that are sturdy and durable. Flimsy trays can easily break or warp, causing unnecessary frustration and potentially damaging your seedlings. Look for trays made from high-quality materials such as recycled plastic or biodegradable materials like peat or coconut coir.
Another important feature to look for in seed starting trays is proper drainage. Excess water can lead to root rot and other fungal diseases, so it’s crucial to have trays with drainage holes. These holes allow excess water to escape, preventing waterlogged soil and promoting healthy root development. Additionally, trays with raised bottoms or ridges can help prevent water from pooling at the bottom, further improving drainage.
In addition to trays, having the right pots for seed starting is equally important. While trays are great for starting multiple seeds at once, pots provide individual space for each seedling, allowing for better root development and easier transplanting. When choosing pots, opt for ones that are biodegradable or made from materials that can be reused, such as plastic or clay.
The size of the pots is also a crucial consideration. Seedlings need enough space for their roots to grow, so choose pots that are deep enough to accommodate their root systems. Small pots may restrict root growth and lead to stunted seedlings, while pots that are too large can hold excess moisture, increasing the risk of overwatering. Generally, pots with a diameter of 2-3 inches are suitable for most seedlings.
Furthermore, it’s important to consider the overall design of the pots. Look for pots with adequate drainage holes to prevent waterlogging. Additionally, pots with slits or ridges on the sides can promote air circulation, preventing the roots from becoming overly compacted and allowing for better nutrient absorption.
When it comes to seed starting trays and pots, investing in quality products is essential. While it may be tempting to opt for cheaper alternatives, they often lack the durability and functionality needed for successful seed starting. Quality trays and pots will last for multiple growing seasons, saving you money in the long run.
In conclusion, quality seed starting trays and pots are essential supplies for successful seed starting. Sturdy and durable trays provide a stable environment for your seeds to germinate and grow, while pots offer individual space for each seedling. Proper drainage, size, and design are crucial factors to consider when choosing trays and pots. By investing in quality products, you’ll set yourself up for a successful and rewarding seed starting experience. Happy gardening!
Essential Tools for Successful Seed Starting
Starting seeds is an exciting and rewarding way to kickstart your garden. Whether you’re a seasoned gardener or a beginner, having the right tools is essential for successful seed starting. In this article, we will discuss the essential tools you need to ensure your seeds have the best chance of germinating and growing into healthy plants.
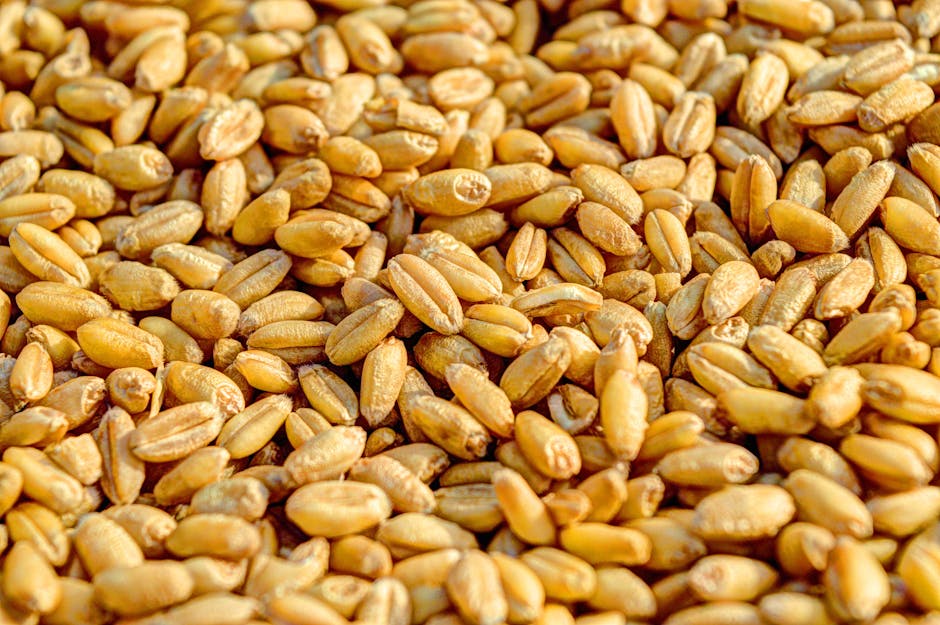
First and foremost, you’ll need a good quality seed starting mix. This is a specially formulated soil mix that provides the perfect balance of nutrients and moisture retention for young seedlings. Avoid using regular garden soil, as it can be too heavy and may contain weed seeds or pathogens that can harm your delicate seedlings. Seed starting mix is available at most garden centers and is well worth the investment.
Next, you’ll need containers to sow your seeds in. There are several options to choose from, including plastic trays, peat pots, and cell packs. Plastic trays are a popular choice as they are reusable and come with a clear plastic lid that creates a mini greenhouse effect, helping to retain moisture and heat. Peat pots are biodegradable and can be planted directly into the ground, reducing transplant shock. Cell packs are convenient as they come pre-divided into individual cells, making it easy to transplant seedlings later on.
To ensure proper drainage, it’s important to have trays or saucers to place your containers in. These catch excess water and prevent it from pooling at the bottom, which can lead to root rot. You can use plastic trays specifically designed for seed starting or repurpose shallow containers like baking trays or even old plastic lids. Just make sure they are clean and have drainage holes.
A heat source is crucial for successful seed starting, especially if you live in a colder climate. Seeds need warmth to germinate, and a heat mat or heating pad can provide the necessary temperature boost. These devices are designed to emit gentle heat and can be placed under your seed trays or containers. Just be sure to monitor the temperature and adjust accordingly to prevent overheating.
Lighting is another essential tool for seed starting. While natural sunlight is ideal, it may not always be sufficient, especially during the early spring months. A fluorescent grow light or LED light can provide the necessary light spectrum for healthy seedling growth. Position the lights a few inches above the seedlings and keep them on for 12-16 hours a day. As the seedlings grow, adjust the height of the lights to maintain the proper distance.
Lastly, a spray bottle or mister is handy for watering your seedlings. Overhead watering can disturb the delicate seedlings, so a gentle mist is preferred. Fill the spray bottle with water and mist the soil surface as needed to keep it moist but not waterlogged. This will help prevent damping off, a fungal disease that can kill young seedlings.
In conclusion, having the right tools is essential for successful seed starting. A good quality seed starting mix, containers, trays or saucers, a heat source, lighting, and a spray bottle are all necessary for healthy seedling growth. By investing in these essential supplies, you’ll be well on your way to a bountiful garden filled with vibrant plants. Happy seed starting!
Choosing the Right Seed Starting Mix for Optimal Growth
Starting seeds is an exciting and rewarding way to kickstart your garden. Whether you’re a seasoned gardener or a beginner, choosing the right seed starting mix is essential for optimal growth. In this article, we will explore the different types of seed starting mixes available and provide tips on how to select the best one for your needs.
When it comes to seed starting mixes, there are a few options to consider. One popular choice is a pre-made seed starting mix, which is readily available at garden centers and online. These mixes are typically made from a combination of peat moss, vermiculite, and perlite. They provide a lightweight and well-draining medium that promotes healthy root development.
If you prefer a more DIY approach, you can create your own seed starting mix using a combination of ingredients. A common recipe includes equal parts peat moss, vermiculite, and compost. This homemade mix allows you to have more control over the ingredients and tailor it to your specific needs.
When selecting a seed starting mix, it’s important to consider the needs of your plants. Some seeds require a specific type of mix to germinate successfully. For example, certain plants, like cacti and succulents, prefer a mix with a higher proportion of sand or grit to improve drainage. On the other hand, delicate seeds, such as lettuce or herbs, may benefit from a finer-textured mix that holds moisture well.
Another factor to consider is the nutrient content of the seed starting mix. While seeds contain their own supply of nutrients to get them started, they will eventually need additional nourishment. Some seed starting mixes come enriched with organic fertilizers or beneficial microorganisms that aid in plant growth. If you opt for a basic mix, you can always supplement it with liquid fertilizers or compost tea as your seedlings grow.
It’s also worth noting that seed starting mixes should be sterile to prevent the growth of harmful pathogens. This is especially important if you are reusing containers or trays from previous seasons. Sterile mixes reduce the risk of diseases that can stunt or kill your seedlings. If you’re making your own mix, consider sterilizing the ingredients by baking them in the oven at a low temperature.
When it comes to moisture retention, seed starting mixes should strike a balance. They should be able to hold enough moisture to keep the seeds hydrated but not become waterlogged, which can lead to root rot. A good mix should feel moist to the touch but not soggy. If you find that your mix is retaining too much water, you can add perlite or coarse sand to improve drainage.
In conclusion, choosing the right seed starting mix is crucial for successful seed germination and healthy plant growth. Whether you opt for a pre-made mix or create your own, consider the needs of your plants, the nutrient content, and the moisture retention capabilities. By selecting the right mix, you’ll give your seeds the best possible start and set them up for a thriving garden. Happy planting!
Must-Have Lighting Options for Indoor Seed Starting
Starting seeds indoors is a great way to get a head start on your garden and ensure a successful growing season. However, in order to give your seeds the best chance at thriving, it’s important to provide them with the right lighting. In this article, we will explore some must-have lighting options for indoor seed starting.
One of the most popular lighting options for seed starting is fluorescent lights. These lights are affordable, energy-efficient, and provide a good spectrum of light for seedlings. When choosing fluorescent lights, look for ones that are labeled as “cool white” or “daylight” as these will provide the best light for your plants. It’s also important to position the lights close to the seedlings, ideally about 2-4 inches above the plants, to ensure they receive enough light.
Another great lighting option for indoor seed starting is LED lights. LED lights are more expensive upfront, but they are extremely energy-efficient and can last for many years. They also produce very little heat, which is beneficial for seedlings that can be sensitive to high temperatures. When choosing LED lights, look for ones that have a full spectrum of light, including both blue and red wavelengths. This will provide the necessary light for both vegetative growth and flowering.
If you’re looking for a more natural lighting option, consider using a grow light system. These systems mimic the sun’s natural light cycle, providing your seedlings with the ideal amount of light throughout the day. Grow light systems typically include a combination of fluorescent or LED lights, as well as a timer to control the light cycle. This can be a great option if you have a large number of seedlings or if you want to automate the lighting process.
In addition to choosing the right lighting option, it’s also important to consider the duration of light exposure for your seedlings. Most seedlings require about 14-16 hours of light per day to grow properly. This can be achieved by setting a timer for your lights to turn on and off at the appropriate times. It’s also important to give your seedlings a period of darkness each day, as this helps them establish a healthy growth pattern.
When setting up your lighting system, it’s important to consider the height and spacing of your seedlings. As your seedlings grow, you will need to adjust the height of your lights to ensure they are always positioned about 2-4 inches above the plants. If your lights are too far away, your seedlings may become leggy and weak. Additionally, make sure to space your seedlings evenly to ensure they all receive adequate light.
In conclusion, providing the right lighting for your indoor seed starting is essential for the success of your seedlings. Whether you choose fluorescent lights, LED lights, or a grow light system, make sure to position the lights close to the seedlings and provide them with the appropriate amount of light each day. By doing so, you will give your seedlings the best chance at thriving and ensure a bountiful garden in the months to come.
Watering and Irrigation Systems for Seed Starting Success
Starting seeds is an exciting and rewarding way to kickstart your garden. However, to ensure success, it’s important to have the right supplies on hand. One essential aspect of seed starting is proper watering and irrigation systems. In this article, we will explore the different options available and how they can contribute to your seed starting success.
Watering is crucial for seed germination and healthy plant growth. One of the simplest and most cost-effective ways to water your seeds is by using a watering can. This traditional tool allows for precise watering, ensuring that each seed receives the right amount of moisture. It’s especially useful for small-scale seed starting or when you have a limited number of plants to care for.
If you have a larger seed starting operation or want a more automated approach, a drip irrigation system might be the way to go. This system delivers water directly to the base of each plant, minimizing water waste and reducing the risk of overwatering. Drip irrigation systems can be set up with timers, allowing you to automate the watering process and ensure consistent moisture levels for your seeds.
Another option to consider is a misting system. Misting systems create a fine spray of water that gently moistens the soil surface without disturbing the seeds. This method is particularly useful for delicate seeds that require a moist environment for germination. Misting systems can be set up with timers or manually operated, depending on your needs and preferences.
In addition to the watering tools themselves, it’s important to have the right containers for seed starting. Seed trays or flats with drainage holes are essential to prevent waterlogging and promote healthy root development. These containers can be filled with a seed starting mix, which provides the ideal balance of moisture retention and drainage.
To further enhance your watering and irrigation system, consider using a humidity dome or a plastic cover. These covers create a mini greenhouse effect, trapping moisture and heat to create an optimal environment for seed germination. They also help to retain moisture, reducing the need for frequent watering.
When it comes to watering your seeds, timing is crucial. It’s important to water consistently but avoid overwatering, as this can lead to damping-off disease and root rot. A good rule of thumb is to water when the top inch of soil feels dry to the touch. This ensures that the seeds have enough moisture to germinate without drowning them in excess water.
Transitional phrase: Now that we’ve covered the different watering and irrigation systems, let’s discuss some additional tips for successful seed starting.
Regardless of the watering method you choose, it’s important to monitor your seeds closely. Regularly check the moisture levels in the soil and adjust your watering schedule accordingly. Remember that different seeds have different moisture requirements, so it’s essential to research the specific needs of the plants you are growing.
In conclusion, having the right watering and irrigation systems is essential for successful seed starting. Whether you opt for a watering can, drip irrigation, or a misting system, it’s important to provide your seeds with the right amount of moisture. Additionally, using seed trays with drainage holes, humidity domes, and plastic covers can further enhance your seed starting setup. By paying attention to timing and monitoring moisture levels, you’ll be well on your way to a thriving garden. Happy seed starting!


